 In this post, we will go through connecting an Excel database using the Database Connection Wizard in CardExchange.
This wizard can seem daunting with its many options and numerous pages. But I will show you just what needs to be done to get your variable data connected and working with CardExchange.
Editor’s note: Excel database compatibility is now available only with the CardExchange Premium edition. Excel compatibility was available with the CardExchange Entry version (Entry is now discontinued and replaced with the Go version, which is not Excel compatible).
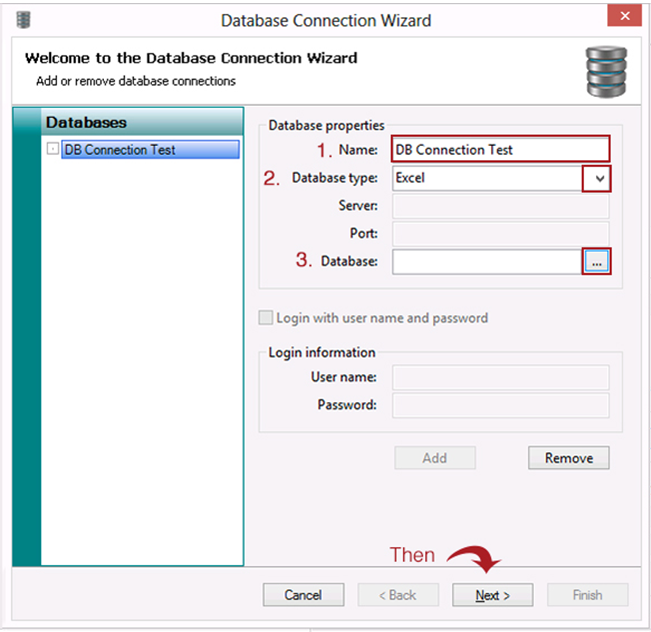
Step 1: Add A Database Connection
To start, click the Add button at the bottom of the Add or Remove Database Connections window. This is where all the magic begins. Once clicked, three fields will light up that we must fill in.

Step 2: Name the Database Connection, Select the Type, & Connect the File
- In the Name field, we will want to give our database connection a name. This will distinguish it from the other database connections.
- In the Database type field, we will need to choose the file type we are connecting to by clicking on the drop down arrow. Be careful to note the file extension that your version of Excel is using. Pre-Excel 2007 will be an .xls and you should select Excel from the drop down list. Excel 2007/2010 will by default use an .xlsx file extension.
- In the Database field, click on the ellipses … button and navigate to the Excel file you will be using for your dataset.
(Note: the Login information is only necessary if you have password protected your Excel sheet.)
Once these steps are complete, click the Next button.
Step 3: Specify from which Views Data Is to be Read
This next screen will ask you for two things:
- In the View name field, select what sheet within your Excel spreadsheet you will be pulling your dataset from.
- In the Primary key field, choose which column will be your Primary Key. (Note: a primary key must be a unique identifier and cannot be repeated.) I generally suggest using an employee or student number since those will always be unique to each individual.
Once you have selected these options, you can click the Next button.

Step 4: Select where to Retrieve the Name Info from
This screen will allow you to select the data that you would like to see in the main screen of CardExchange. The titles are mostly suggestions – you can pick any column you like from your dataset. This is really a way to help you manage your card printing workflow. (Note: Later CardExchange will offer to combine First, Middle and Last names and it will use whatever data you select for the First, Middle and Last name fields here, so keep that in mind.)
After you have made your selections you may then click the Next button.

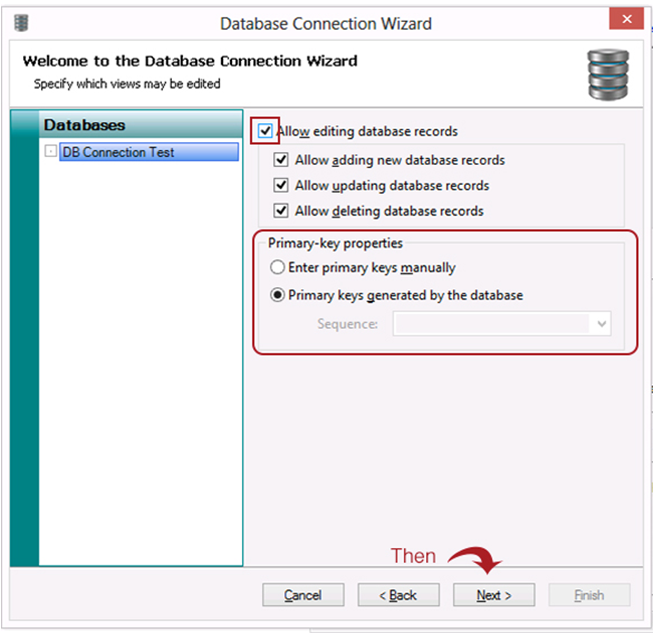
Step 5: Specify which Views May be Edited & Primary Key Properties
On this screen you need to consider two things:
- Will you be adding or editing the records in your dataset? If so, you will need to check the box to Allow editing database records. You can also deselect the various options below that selection.
- Whether or not you would like CardExchange to generate the primary key for you. In most cases the default selection (seen here) is fine, but it will depend on what you are using for your primary key and if you need more control over the column you chose as your primary key.
After you have made these selections you may then click the Next button.
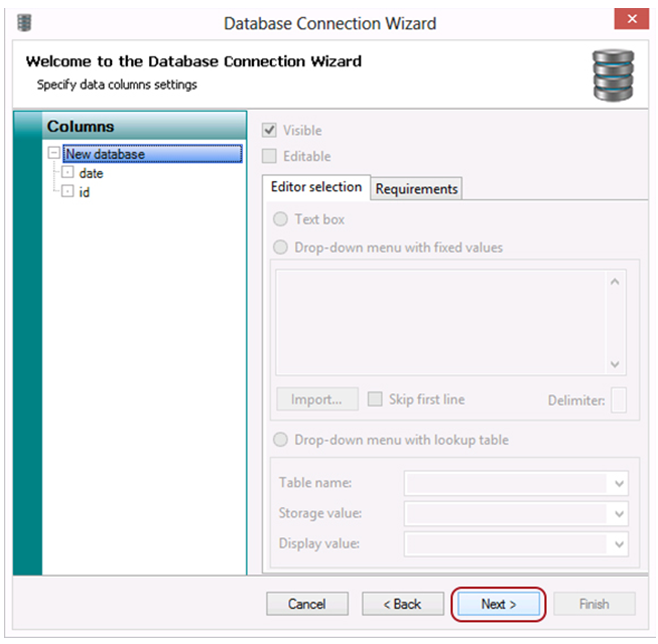
Step 6: Specify Data Columns Settings – Advanced Users Only
You can simply click the Next button here. The data columns settings are advanced settings that are generally unnecessary for most users’ needs. You can feel free to explore them at your leisure.
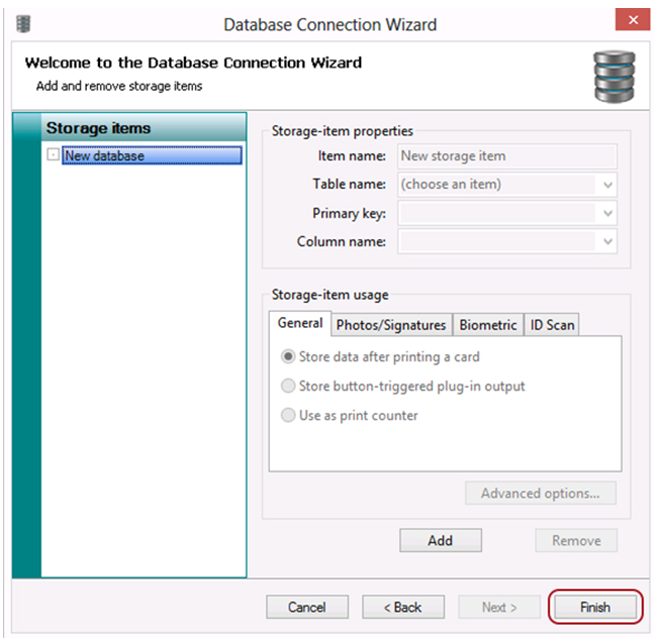
Step 7: Add & Remove Storage Items – Advanced Users Only
And we have made it to the final screen of the Database Connection wizard! Again we see more advanced options that you can look into further for your specific needs – but for the most part, you can simply click the now highlighted Finish button.
Once you have done that, you have successfully connected your Excel spreadsheet with your unique data set to CardExchange.
See More CardExchange Tech Support Posts
Questions?
If you have questions about using your CardExchange software, contact us at 877-868-0012 or [email protected]. If you own CardExchange Go or Premium, you can also sign up for a 1-hour getting started tutorial with me, Jeramie Ivie, ID Card Group’s Technical Expert.
ID Card Group offers a price match guarantee, provides free shipping on orders over $100, and accepts purchase orders.
About the Author

Jeramie Ivie is a trained and certified ID printer technician at ID Card Group. When not troubleshooting for customers, he’s putting the newest card printers through their paces and writing candid reviews like this one. Jeramie is also the resident artisan overseeing all custom printed work, including custom printed cards, lanyards and badge reels, but he still finds time to serve as grill master for BBQ Fridays. Jeramie literally prints thousands of cards each month for a wide-variety of customers. He has seen it all and offers a practical view of card printers. Be sure to visit his Google profile to check out his latest project and to find out what it means to be a mechnician.


