Why did CardExchange (CE) Generate a “No Cards Have Been Printed” Error?
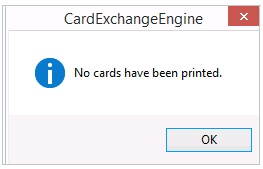
I get a lot of calls related to the error: “No cards have been printed.”
This error generally comes up for two reasons:
- The photo is not correctly named or is missing
- The photo element was not configured properly in the card setup wizard.
This second situation is the most common and will be the topic of our discussion today.
The Problem Lies in the Photo Element Properties

One of the more complicated database connections in CardExchange is the photo element. This requires several additional steps that other database connections don’t require, because you are pulling in additional elements, namely the variable photo stored in a folder. For this tutorial we will assume you are storing your photos in the default CardExchange Data folder.
For whatever reason, you have gone through the setup wizard and come to the point that shows your card design without a picture.
Being eager to use your new printer, you try to print your card only to be told no cards have been printed. Here’s how to fix this error:
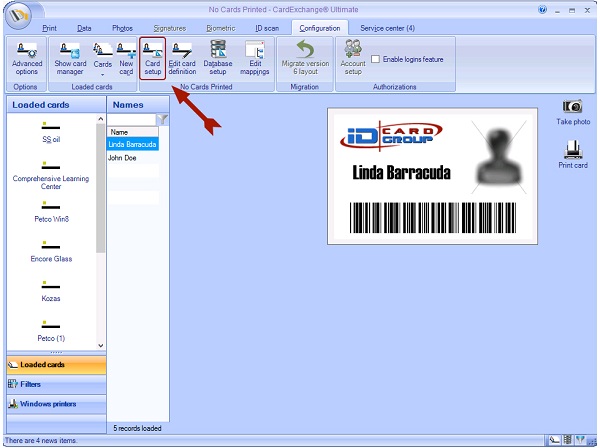
Step One: Open the Card Set-Up
To correct this error, we need to make sure the picture element is correctly configured. Let’s first start with opening the card designer by selecting the configuration tab and clicking on the Card Setup button.
Step Two: Select the Photo Element and Check the Properties
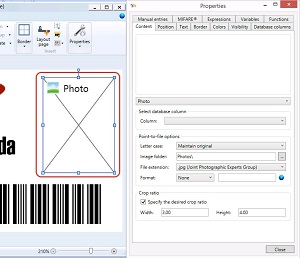
This will launch the card configuration window. You will need to select the photo element. Most times this element is not configured correctly.
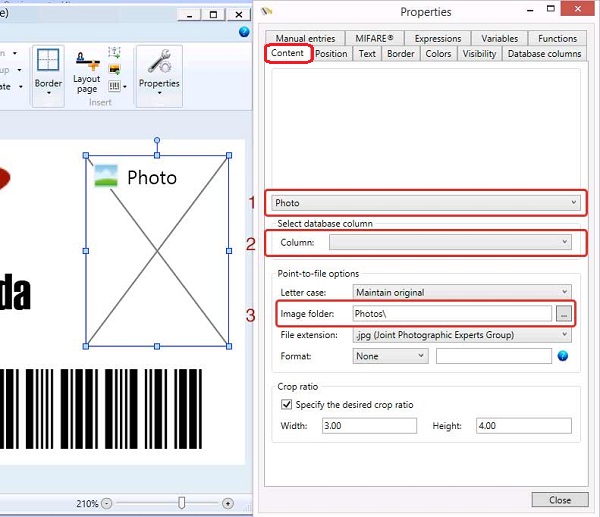
Next, select the Content tab and check the photo elements properties. In Box 1, notice that the Photo element is selected. If not, be sure to switch it to the Photo. In Box 2, select the column that is storing the name of your photo. It is important to remember that you are not storing the photo here, only the name of the photo. This will tell CardExchange the name of the photo to pull in for a particular record. In Box 3, navigate to the folder where your photos are stored.
This can be a little confusing if you are importing from a different folder or drive. In the case, CardExchange will store the photo with the name in the columns selected in Box 2 and save it in the folder selected in Box 3. If you are taking new photos through CardExchange, Box 3 is where those new photos will be stored.
Step Three: Print Your Cards
Once have checked and corrected these setting you should be all set to print your cards.

If you are still unable to print cards, as always, email me at [email protected] or give me a call at 877-868-0012.
Questions?
If you have questions about using your CardExchange software, contact us at 877-868-0012 or [email protected]. If you own CardExchange Go or Premium, you can also sign up for a 1-hour getting started tutorial with me, Jeramie Ivie, ID Card Group’s Technical Expert.
ID Card Group offers a price match guarantee, provides free shipping on orders over $100, and accepts purchase orders.


